YubiKey Setup

Dec 19, 2025
 305
305
YubiKey Setup
Yubikey Setup
Step 1: Download YubiKey Smart card Minidriver (Windows) and Authenticator
Click on the following link Minidriver
YubiKey-Minidriver 4.6.3.252 – x64 Installer
Click on the following link Authenticator
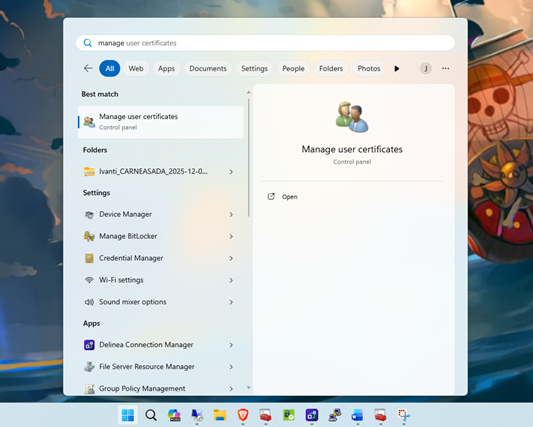
Step 2: Open manage user certificates
- On your keyboard hit the Windows key and type/select Open manage user certificates.
Then:
- Go to Right click personal -> All Tasks ->Request New Certificate
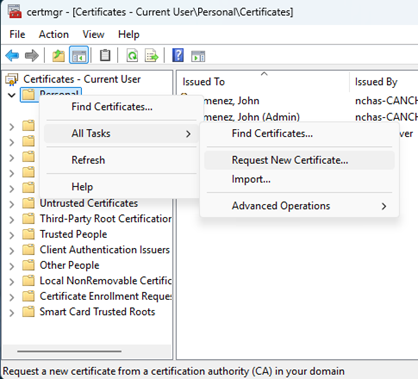
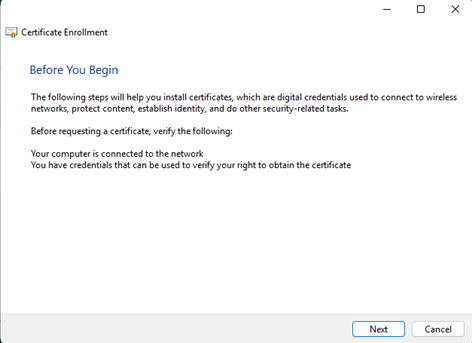
- In the Before You Begin section select Next.
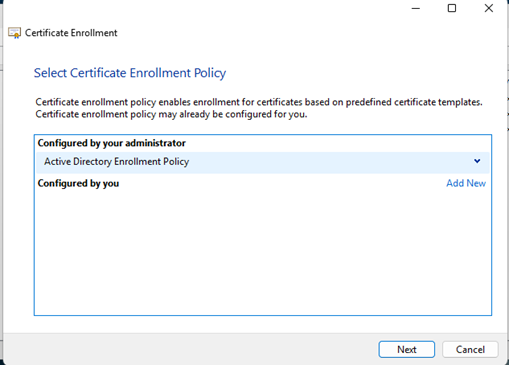
- In the Select Certificate Enrollment select Next
- Choose:
Admin Smart Card Logon
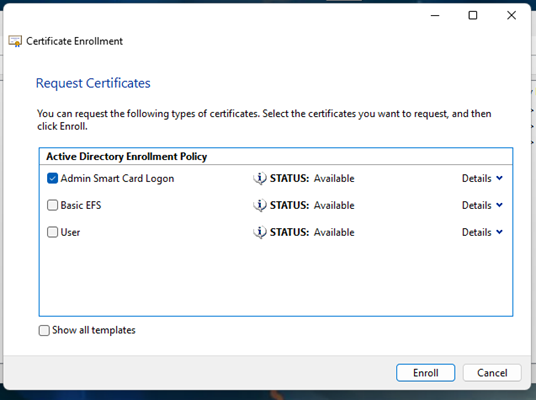
- Click Enroll
STEP 3: Export the Certificate with the Private Key
- On your keyboard hit the Windows key and type/select Open manage user certificates.
- Personal
- Certificates
- Find the certificate with your name and with the intended purposes being Smart Card Logon.
- Right-click the certificate →
All Tasks → Export
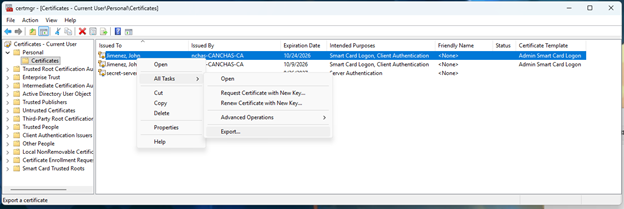
- When the wizard opens:
Choose Yes, export the private key and leave everything else default - Format:
Personal Information Exchange (.PFX) - Check:
“Include all certificates in the certification path” - When prompted, set a temporary password — we only need it briefly.
- Save the file to Documents as:
YOURINITIALScert.pfx
Click Finish.
Setting up Yubico Authenticator
Step 1 Change the default PIN
Plug in your key
In YubiKey Authenticator:
- Go to Certificates → On the right hand side you’ll see three settings
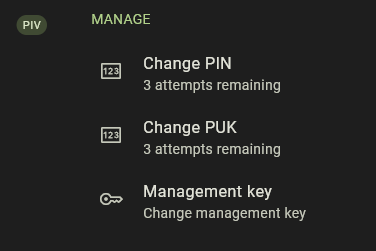
- Change the PIN and PUK to something you will remember and save it in 1pass under your account.
Step 2 Change the Management Key (important)
Click Management key
Choose:
Set to new random key.
(Send the management key to [email protected])
STEP 3 Import the Certificate into the YubiKey (Slot 9a)
Use YubiKey Authenticator:
- Open YubiKey Authenticator
- Go to:
Certificates - Click slot:
9a - Authentication
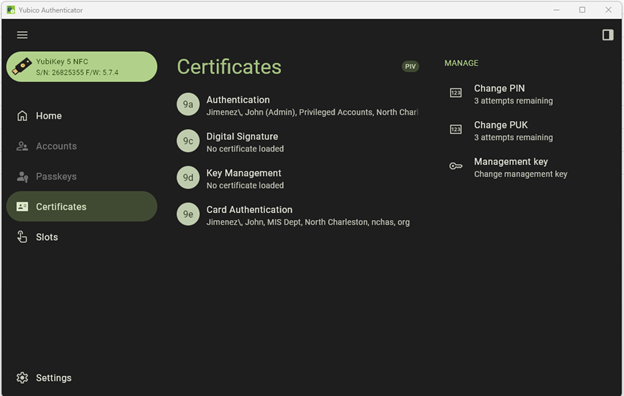
- Click:
Import from file - Select your exported .pfx file from earlier.
- Enter the temporary password you set during export.
- When prompted, enter your YubiKey PIN.
- Import.
Once complete, slot 9a should now show the certificate details.

